Next.js Cron Guide
This guide covers deploying an API endpoint to Vercel and triggering it once every hour using Slater.
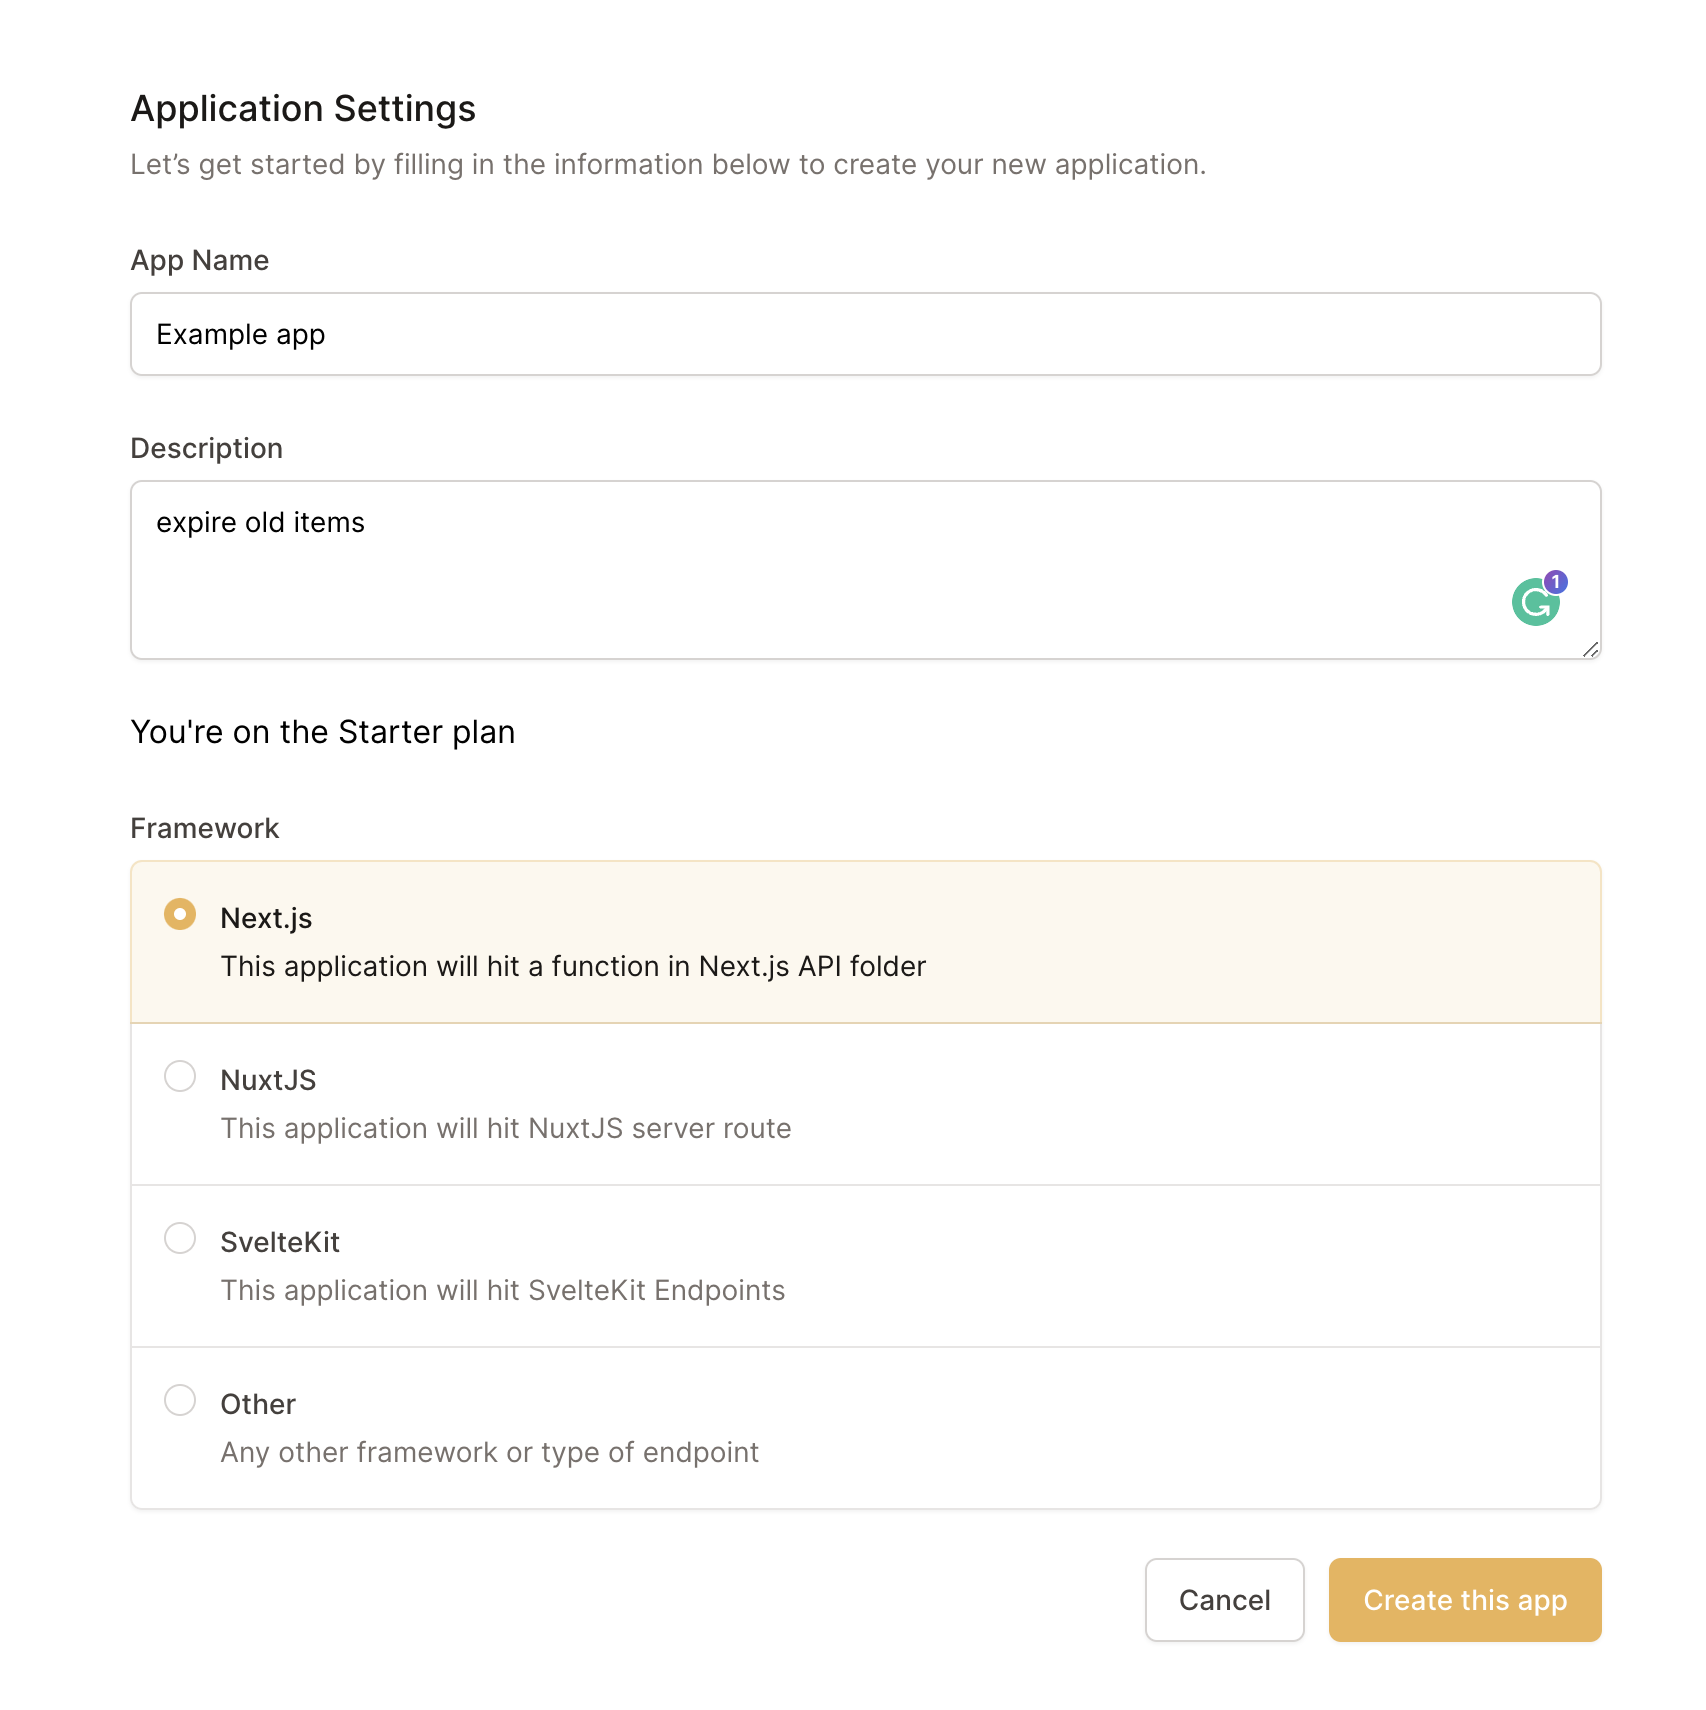
Create an API endpoint
To create a new endpoint in Next.js, simply add a file to the /api folder.
If you don't have an existing Next.js app, use npx create-next-app to get started quickly.
Here's an example:
// /api/crons/expire.js
export default function handler(req, res) {
  try {
    // delete this for your business logic instead
    const result = db.updateMany({
      where: { date: { lte: new Date().toISOString() } },
      data: { expired: true },
    });

    return status(200).json({
      data: result.map((x) => x.id),
      message: `expired ${result.length} records`,
    });
  } catch (err) {
    res.status(500).json({ error: "internal error", message: err });
    console.log(err);
  }
}
Deployment
Add environment variables
Come up with what your process.env.SLATER_SECRET will be and set it as an environment variable in Vercel. After setting the value, you might need to trigger a redeployment so the latest value is live.
Deploy to Vercel
To deploy your application to Vercel, you can either:
- Connect your GitHub repository (recommended)
- Use the CLI to manually push up and deploy the application
For path number one, simply click "new project" in the Vercel dashboard and select your existing GitHub repository.
For path number two, install the Vercel CLI in your terminal and run vercel --prod.
Set up Slater
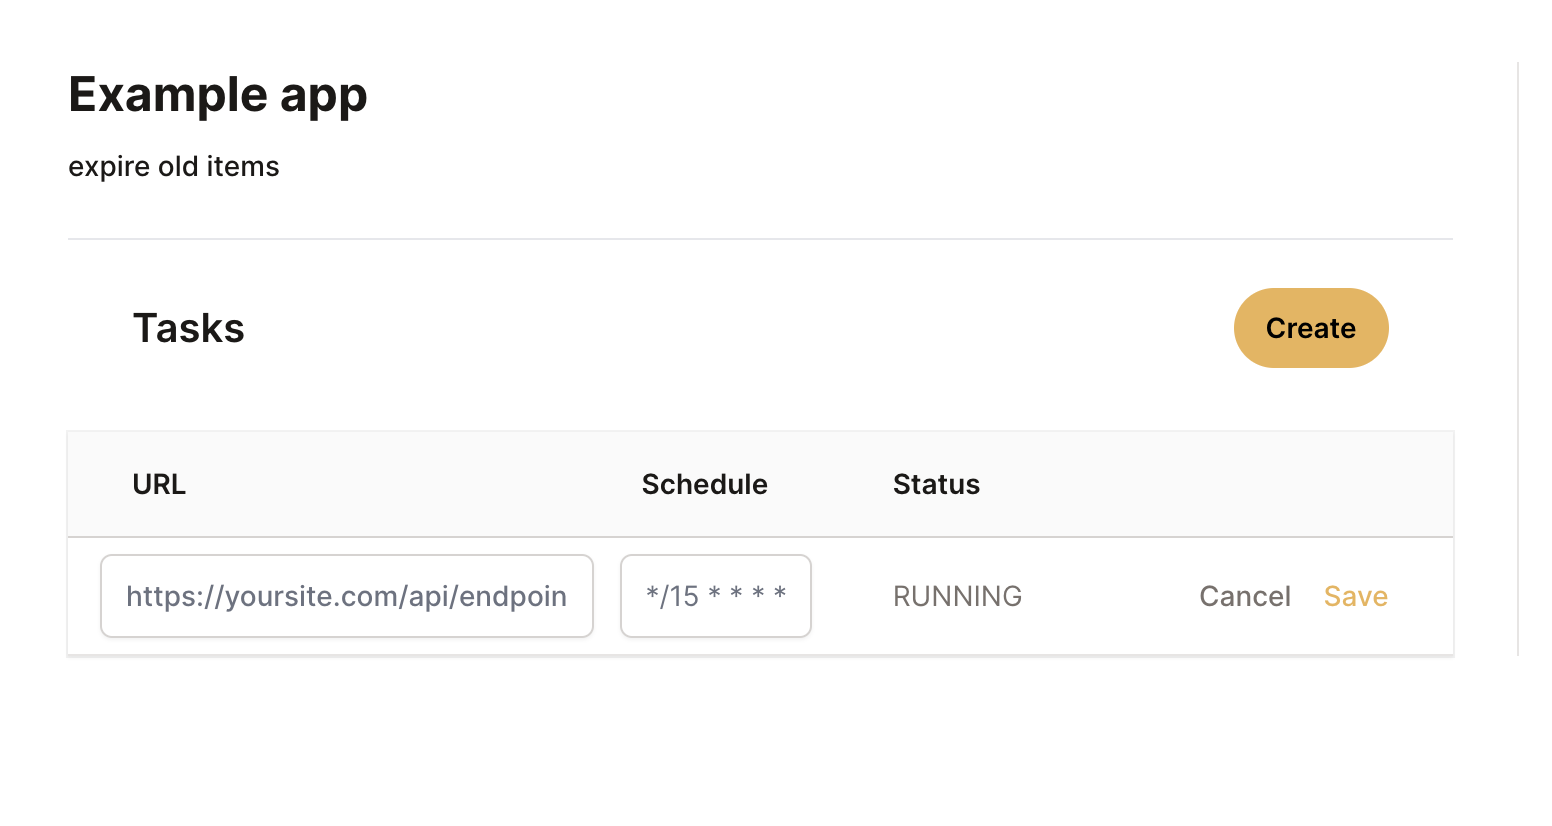
After deploying to Vercel, you'll have a production domain. Test the endpoint is working by manually visiting https://YOUR_SUBDOMAIN.vercel.app/api/crons/expire. With the above example code, if you get back a result of {data: [1,2,3], message: 'expired 3 records'} then you're good to go.
Next, create an application in Slater.
Free tier
For a limited time, all new Slater accounts come with 2,000 executions for free. This means no credit card is required to get started. Once you run out of executions, you'll get an email asking you to buy more.
Sign in with Github to claim your 2,000 free executions.
Determining your cron schedule
Using crontab.guru, figure out the cron expression that relates to the interval you want to trigger your function at.
Slater's datetime is based off of GMT, so you'll need to adjust if you want to trigger based on your own timezone.
Confirming it's working
Slater schedules it's tasks five minutes prior to executing them, so check back prior to your cron executing. We're working to add manual triggers as well in an upcoming release.
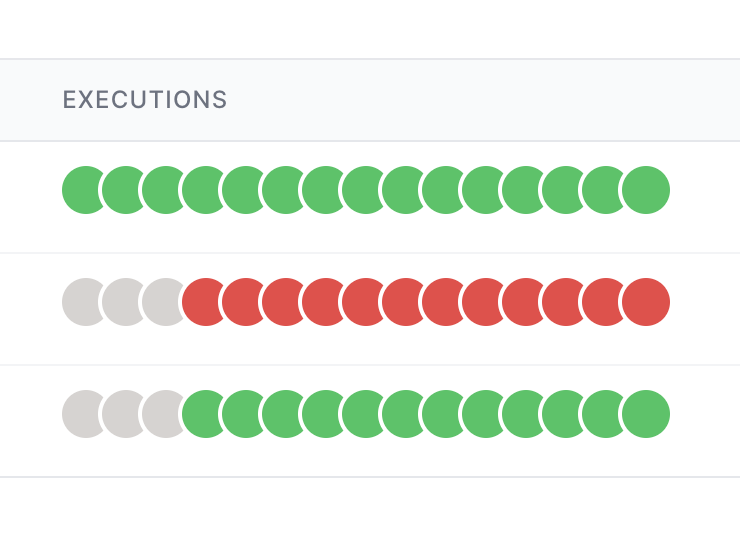
Gray jobs are scheduled but yet to be run, red jobs have errored in some way, and green jobs were processed successfully.